Finger Stick Blood Test: Steps, Best Practices, FAQs & Tips
Reviewed by: Melissa Herrmann Dierks , RDN, LDN, CDCES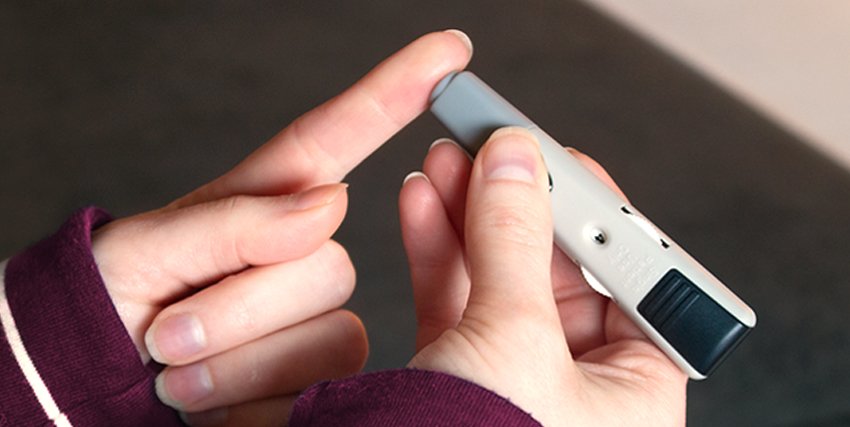
For those who have diabetes, testing your blood sugar regularly can be an important aspect to controlling your blood sugar. There are different methods to obtain a blood sugar reading, including finger stick blood tests using a blood glucose monitor or by wearing a sensor for readings 24 hours a day, with a continuous glucose monitor (CGM).
A finger stick blood sugar test is the most common way for people with diabetes to get insight into how foods, medications, physical activity, and other variables affect their blood sugar levels, and how to take action. Therefore, understanding how to perform a finger stick blood test correctly and maintaining good testing habits is important for your diabetes self-care. Below we’ve outlined some tips to help you get started.
- What is a finger stick blood test?
- Common factors that can affect finger stick blood sugar tests
- Steps for a finger stick blood sugar test
- How to dispose of single-use testing supplies
- FAQs: Finger stick blood sugar tests
What is a finger stick blood test?
Blood pumping throughout your body transports a variety of essential nutrients your cells need, like oxygen and glucose. A finger stick blood test is an easy way to measure the amount of a certain substances in your blood, by making a small prick into your fingertip and collecting a blood sample into a specially designed test strip or into a thin tube for laboratory testing. These convenient, easy tests only require a small amount of blood.
Depending on the specific test being performed, a finger stick blood test can be used to measure glucose, hemoglobin A1C, ketone, lactate levels, and more.
Why do people with diabetes use finger stick tests?
For people who have been diagnosed with diabetes, blood sugar levels are “self-monitored” with the use of a personal blood glucose meter and blood glucose test strips. Taking a finger stick test at home or on the go is a quick, cost-effective way to check blood sugar levels throughout the day and make any necessary treatment decisions, like dosing insulin.
Finger stick tests may also be performed by a healthcare professional for assisted monitoring of blood sugar. This involves drawing a drop of blood from the fingertip with a single-use, auto-disabling finger stick device for testing in a clinical care setting. The finger stick device in these settings may have a larger lancet size, which can sometimes cause slightly more pain compared to a finer lancet used when testing at home.
How are finger stick blood tests different from a venous blood draw?
In some situations, your healthcare provider may recommend a blood test by a venous blood draw, called venipuncture. This process is different from a finger stick test (which uses capillary blood from your fingertip) and is performed by trained clinical staff who draw blood from a vein in your arm.
The blood is then processed to remove red blood cells, so only the plasma is tested. Lab tests are performed on calibrated machines run by trained lab technicians, so they may provide more precise results.
Common factors that can affect finger stick blood sugar tests
When testing blood sugar levels, there are different factors that can affect the accuracy of a finger stick test including:
- Temperature, humidity, and elevation
- Testing site location, such as fingertip vs. forearm
- Expired or damaged test strips
Some factors are related to the finger stick process and have simple solutions to improve the accuracy of your results. Consider these factors the next time you test:
Residue on unwashed fingers
When performing a finger stick blood test, the first surface the lancet touches is the outer layer of your skin; this is also where the blood drop will collect. Any food or substances that leave a residue on your fingers, like lotion or unseen particles from food, may interfere with the blood sample and potentially affect your blood sugar reading.
The Centers for Disease Control and Prevention (CDC) recommends washing your hands with soap and warm water and thoroughly drying them before pricking your finger. Making this part of your testing routine is a great step toward improving the accuracy of your results.
Insufficient blood drop
Producing a blood drop that completely fills a blood glucose test strip sample area is necessary for the system to correctly calculate your results. Some people have no issues getting a blood drop for a finger stick test, while others may find it difficult at times.
If you have this issue, there are remedies you can try to make this easier. It’s important to remember, despite the temptation to squeeze directly at the site you have pricked, that you need to avoid pressing near the test site when forming a blood drop. This could cause interstitial fluid — the fluid surrounding your cells — to leak into your blood sample and affect your test result.
Below we outline a few tips to help produce a blood drop if you are not getting enough blood for your glucose test. See if one of these potential causes could be affecting your finger stick and learn how to remedy the issue.
- Potential Cause: Hands are cold. Solution: Warm hands under warm water, washing and drying them thoroughly before testing.
- Potential Cause: Poor circulation. Solution: Let your hand hang down, and flap or shake your hands and arms to get blood flowing.
- Potential Cause: Lancing depth is too shallow. Solution: Many lancing devices have adjustable settings to control how deep the lancet will puncture. Adjusting the device to a deeper setting can help to produce a larger droplet.
- Potential Cause: Lancet gauge is too fine. Solution: The lancet needle may be too small to penetrate calloused hands or successfully produce a large enough blood drop for certain individuals. Try experimenting with a lancet gauge that works best for you.
- Potential Cause: Reusing a lancet. Solution: If you are not in the habit of changing your lancet frequently then the lancet tip can become dull and result in a less successful finger stick. Use a new lancet each time you test.
4 steps to perform a finger stick blood sugar test
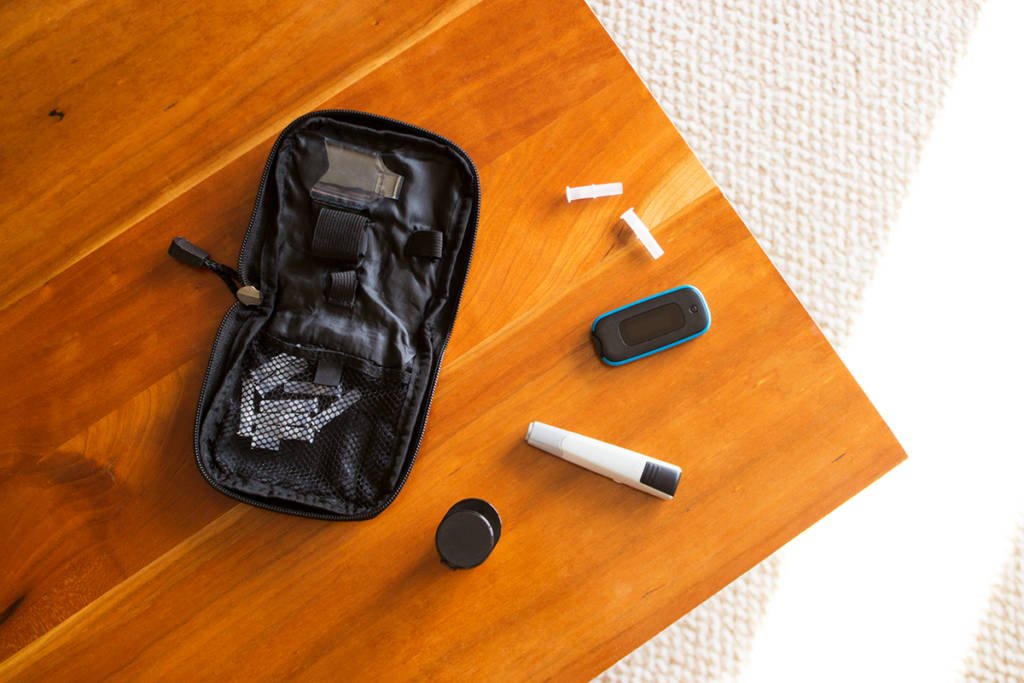
The most common way for people with diabetes to check their blood sugar is with a personal blood glucose meter. In order to get started, gather all the supplies needed to check your blood sugar, including:
- Blood glucose meter
- Lancing device and lancet (for getting a drop of blood)
- Test strip
- Batteries for the blood glucose meter (typically included)
Whether you’re new to or skilled at monitoring your blood sugar, it can be helpful to walk through key steps to brush up on best practices. You may find even one small adjustment you can make that will be a game-changer to your testing experience.
Step 1: Prepare your lancing device
A lancing device is used in combination with a lancet to prick the test site, causing a blood drop to form. Finger stick devices and lancets are intended for single-person use; the CDC warns against sharing lancing devices due to the risk of transmitting bloodborne pathogens.
Insert a new lancet into your lancing device and cock the device so it is ready for use, according to the manufacturer’s instructions. It is recommended to use a new lancet each time you test. A used lancet can become dull with multiple uses. This can lead to discomfort and increase the risk of infection.
Some lancing devices also have a depth selection dial, which can be adjusted to the most comfortable setting that can produce a blood drop.
Tip: Using a new lancet and smaller needle size may help reduce pain. The smaller the gauge number, the larger the needle will be.
Step 2: Choose a testing site on your finger
When testing blood sugar, finger stick tests provide more accurate results than testing on the palm of your hand or forearm, due to the physiological differences between these sites. Using a blood sample from your fingertip is recommended by the Food and Drug Administration (FDA) during times when your blood sugar may be changing rapidly, or if you are using your result to calibrate a continuous glucose monitor or dose insulin.
Select a site on your finger that is on the side of the fingertip, avoiding your nail and areas that are scarred. Be sure to alternate fingers each time you test and also to switch between sides. This can help reduce the chances of scarring.
Tip: Testing on the side of your fingertip may be more comfortable than pricking the pad (center) of your finger. This can also help lower the risk of infection since the pads of your fingertips touch many surfaces while the sides do not.
Step 3: Clean the test site
Wash your hands with soap and warm water before performing a finger stick test. Be sure they are thoroughly dry, as leftover water droplets on your finger may affect your blood sugar reading. If you typically have issues getting a blood drop to form, running your hands under warm water as you wash them or massaging your finger can help with blood flow.
Tip: Using alcohol wipes can dry your skin, potentially making it hard to get a blood drop. This may affect your test results. If you can wash your hands with soap and water, choose this method for cleaning your hands and only use an alcohol wipe if this option is not available.
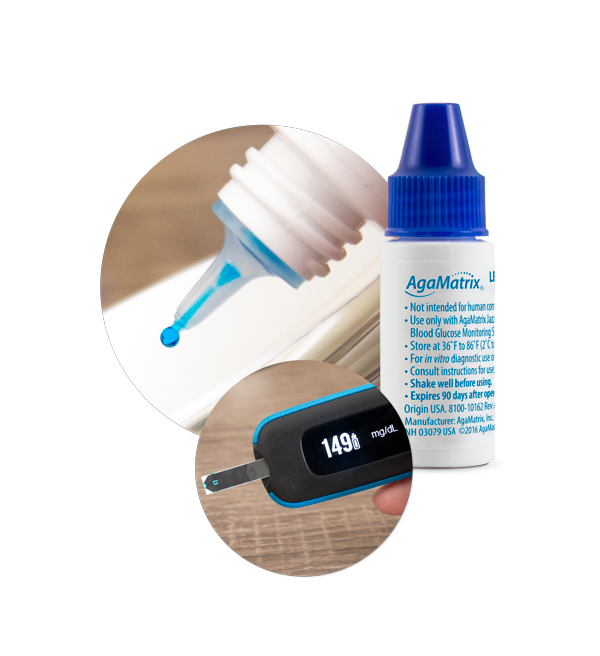
Step 4: Apply blood sample to the test strip
Before you prick your finger, prepare your meter by inserting a new test strip according to the manufacturer’s instructions. Do not apply blood to the test strip until your meter is on and displaying the testing screen.
Once your meter is ready, hold the lancing device — loaded with a lancet — against the test site with gentle pressure and press the release button to prick your finger.
Make sure the blood drop is large enough to fill the test strip and bring the blood sample to the test strip. Most test strips will quickly wick the blood into the sample area within a few seconds. The meter may provide a visual or audio indication when to remove your finger, after enough blood has been applied.
For more information on how to test your blood sugar see the how to test your blood sugar article.
Tip: As you bring the blood sample to the test strip, avoid wiping or smearing blood on areas outside the designated sample area. Only the edge of the test strip with the sample area should come in contact with the blood sample.
How to dispose of single-use testing supplies
Some of the supplies you use to test your blood sugar are intended for single use only and need to be disposed of safely to prevent others from contact with used and potentially harmful supplies. It is important to carefully dispose of:
- Lancets
- Needles, for those who take insulin
- Test strips
For at-home containment of used testing supplies, the Food and Drug Administration (FDA) recommends getting an FDA-cleared sharps disposal container. These are typically available from pharmacies, healthcare providers, medical supply companies, or online. Some local regulations allow alternative disposal containers, like an empty, heavy-duty plastic detergent bottle with a tight-fitting, puncture and leak-resistant lid.
When your sharps container reaches the “full” line or is three-quarters full, dispose of it by following your local guidelines for biohazardous materials. Some communities have collection sites, special pick-up services, or mail-back programs. To learn more, see the FDA’s article on safe disposal for used needles and sharps.
Once you have completed your test, immediately place the single-use testing supplies into a sharps container to reduce the chances of a loose lancet or needle poking you or others. Some lancets come with safety caps to cover the exposed needle during the removal and disposal process. Safety caps should be used if you do not have immediate access to a sharps container.
FAQs: Finger stick blood sugar tests
Testing your blood sugar at home using a blood glucose meter can be simple and convenient, yet it is not uncommon to have questions. Here are some frequently asked questions about performing a finger stick test, answered by our Certified Diabetes Care and Education Specialist (CDCES):
Q. If my number doesn’t match my symptoms and I need to retest, should I use the same spot to get another drop of blood?
A. No. Prick a different finger in order to get a fresh, whole blood sample without extra fluid mixed in from too much squeezing.
Q. How many times can I use my lancet?
A. For a comfortable test, and to reduce risk of infection, change the lancet every time.
Q. Can I use alcohol to clean a lancet and reuse it?
A. No. Lancets are made with a protective antibacterial coating and using alcohol can remove it. Do not try to clean and reuse lancets.
Q. I have a favorite finger to poke that seems to hurt less than the others. Is it ok to stick the same finger at every test?
A. For the best results, rotate fingers and use each side of each finger to test with. Fingertips can become dry, cracked, and calloused with frequent blood sugar testing. You may also want to use a lotion specifically designed for people who do finger stick testing — ask your healthcare provider for a recommendation.
Q. Do I have to use a lancing device? I like to just stick my finger with the lancet.
A. You do not have to use a lancing device. You can use a clean, new lancet and control the stick yourself. Lancing devices are designed to offer different depth levels for finger sticks for comfort, but you do not have to use one.
—
A finger stick test is an easy way to check blood sugar levels conveniently at home. Practicing good finger stick testing habits can help reduce factors that can affect the accuracy of blood sugar readings and may make your testing experience more comfortable. These habits can be as simple as washing your hands with soap and water before every test, rotating which finger you test from, or changing your lancet after each use.
If you find it difficult to change your testing habits, try choosing one to focus on at a time. Once you have that mastered, choose a second, and so on. In the long run, you may have less frustration and a more seamless testing experience with some small adjustments to your routine.
![Blood Sugar Levels: What is Normal, Low or High, Target Ranges & More [w/ Downloadable Chart]](https://agamatrix.com/wp-content/uploads/2019/11/Blood_Sugar_Levels_Chart_Feature_Image-1-1024x683.jpg)